
OEM Sanding Discs 5 Key Factors to Consider Before Buying
2026-10-05
Finding the right OEM sanding discs can make or break your finishing quality, but with so many options flooding the market, where do you start? Before you commit to a bulk order, there are five critical factors that separate reliable, high-performance discs from costly disappointments. At SHENZHEN SUN ABRASIVES, we’ve seen how the wrong choice leads to uneven wear, wasted material, and frustrated operators. This guide cuts through the noise to help you evaluate exactly what matters before buying — so your next production run runs smoother and lasts longer.
Material Compatibility: Not Every Disc Works on Every Surface
Choosing a disc without checking what it was designed to cut or grind is one of the fastest ways to waste time and ruin both the tool and the workpiece. A fiber-reinforced cutting wheel meant for mild steel will load up quickly on aluminum, while a diamond cup wheel intended for concrete can skate harmlessly over a painted metal surface or tear into soft wood without making clean progress. The bond that holds the abrasive grains together is just as important as the grain type itself: a hard bond works for soft metals, but on hard materials it simply glazes over and stops cutting.
The problem goes beyond poor performance. Using a ferrous-metal disc on stainless steel can leave behind iron particles that rust and contaminate the surface, which is a serious issue in food processing or marine applications. On the other hand, a disc rated for high-tensile alloys may be far too aggressive for thin sheet metal or plastic, causing gouging, heat buildup, and edge chipping. Some surfaces also react badly to certain binders or fillers in the disc, so even if the abrasive grit is correct, the disc as a whole may not be compatible.
Before mounting any disc, take a moment to read the marking printed on the blotter or the metal ring. Look for the material group it was made for, the maximum RPM, and any restrictions such as "not for aluminum" or "wet use only." If you are working with an unusual substrate, like fiberglass, lead, or a coated surface, test the disc on a scrap piece first and watch for discoloration, loading, or unusual spark patterns. A quick check can prevent a lot of rework and keep your equipment in good shape.
Grit Selection: Matching Abrasive to the Job Without Overdoing It
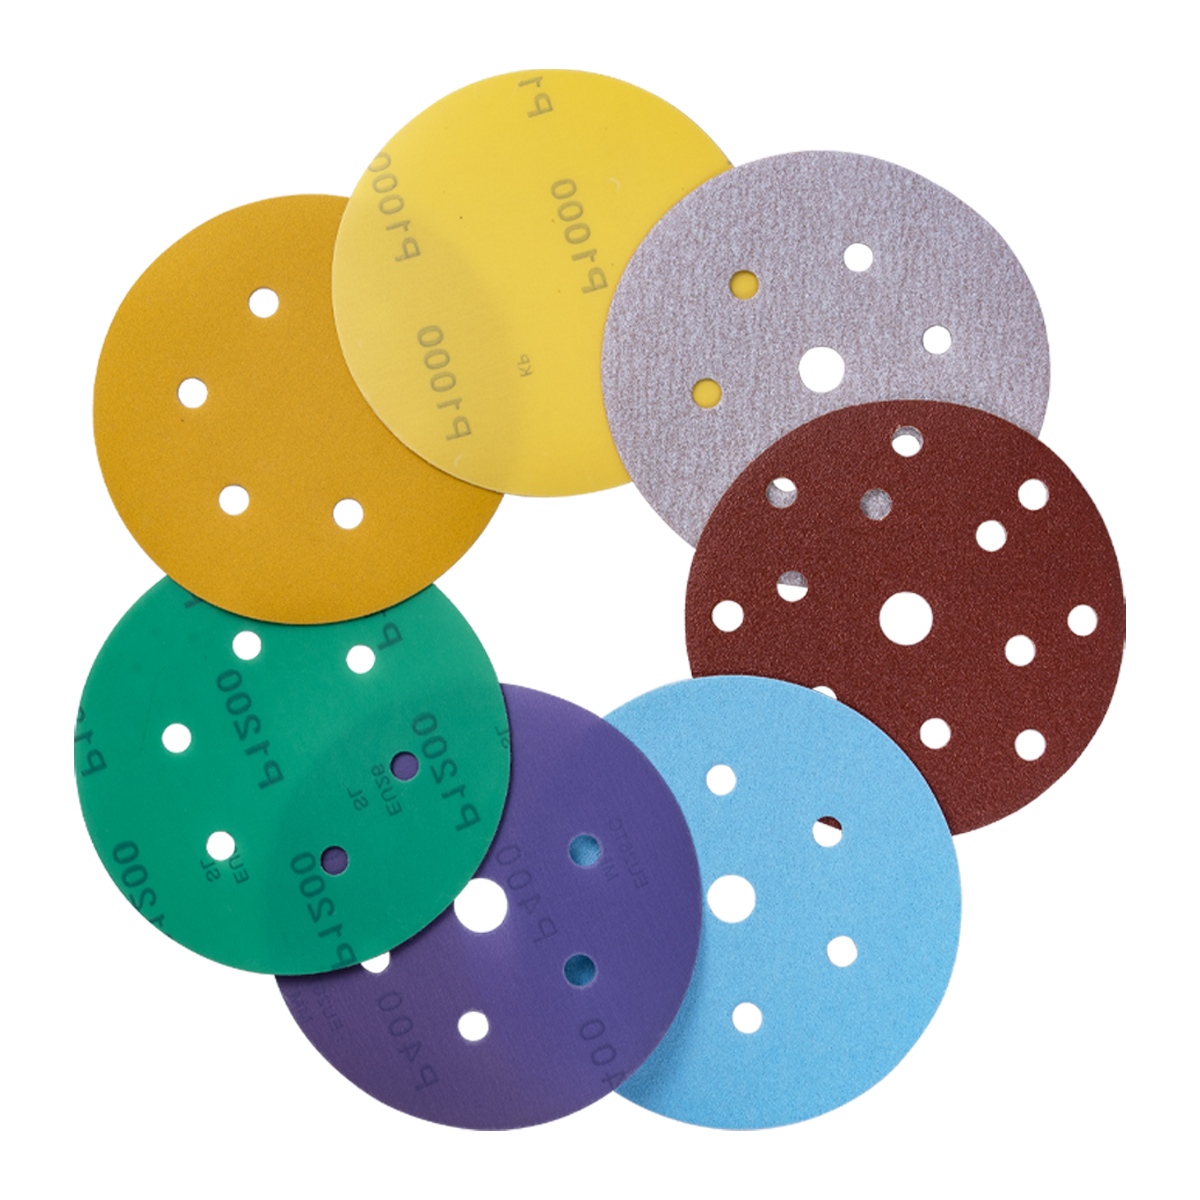
Choosing the right grit often comes down to reading the metal, not the spec sheet. A coarse 36 or 60 grit will tear through mill scale and heavy rust fast, but it also leaves deep valleys that demand extra work later. If you only need to knock down light surface debris before priming, jumping straight to 80 or 120 grit saves you from having to fix unnecessary gouges. The goal is to let the abrasive do the essential cutting without carving more than the job requires.
Think about where the finished part will live. Outdoor structural steel that gets a heavy epoxy coat can hide a 60-grit profile without issue. But a handrail or table base that will be powder coated in a smooth gloss needs a finer, more uniform scratch pattern — usually 120 or 150 grit once the heavy work is done. Every step down in grit number adds labor, so matching the final finish expectation upfront prevents sanding the same spot three times over.
A simple rule that works on most shop floors: start with the coarsest grit that still controls the material removal. Test a small patch. If it takes more than two passes to remove the defect, you are probably using too fine a grit for the first cut. If it leaves scratches you can catch with a fingernail, you have gone too coarse for the final stage. Let the part tell you when to step down — not habit.
Backing Plate Choices: Fiber, Film, or Paper?
You’ll reach for fiber when the job is ugly—old paint, heavy rust, a welded seam that needs flattening. It takes abuse without tearing or rounding over edges, and it keeps its shape even when you bear down with a coarse grit.
If you’re doing fine finishing or wet sanding, film is the quiet overachiever: uniform thickness, no swelling, and it follows contours without ghosting. That consistency matters when you’re chasing a flawless clear coat or working a curved panel with 1500 grit.
Paper remains the budget-friendly workhorse for dry sanding on flat wood or drywall, but it will delaminate fast if you push it through water or high heat. Keep it for quick scuffs and open-coat jobs where you don’t mind swapping discs more often.
Attachment Style: Hook-and-Loop vs. PSA Trade-offs
Hook-and-loop backing shines when you need to swap discs frequently during a single project. The fabric loops grab onto the pad's hooks, so changing from 80 to 220 grit takes seconds rather than minutes. That speed comes with a trade-off: the loop layer adds a tiny bit of cushion and thickness, which can round over sharp edges or prevent you from getting perfectly flush against a corner.
PSA discs sit thinner and flatter against the backing pad, giving you a firmer, more direct transfer of pressure to the work surface. This makes them the better choice for fine finishing, edge work, or any task where you need to feel exactly what the abrasive is doing. The downside is obvious once you try to remove one - the adhesive leaves residue and the disc usually tears, so each disc is a one-shot deal.
The real decision often boils down to volume versus precision. If you're sanding a large flat tabletop and changing grits several times, hook-and-loop saves enough time to justify the slightly softer interface. If you're doing delicate trim or working close to a finished edge, the crisp, low-profile contact of a PSA disc is worth the extra clean-up and replacement cost.
Durability Expectations: How Long Should a Disc Actually Last?
A brake disc's working life isn't stamped anywhere on the box, and anyone who gives you a single number is guessing. On a commuter car, 30,000 to 50,000 miles is a reasonable window, but that assumes normal braking, clean calipers, and pads that aren't overly aggressive. On a bike or a performance car pushed hard, a disc can wear thin in a fraction of that time.
What kills discs early is rarely the mileage alone. Heat cycling, pad material, corrosion from road salt, and even a slightly warped hub can all shorten the lifespan. You'll usually notice a lip forming at the outer edge or hear a rhythmic scrape before the disc actually fails. Measuring thickness with a micrometer is the only way to know for sure, and most discs have a minimum thickness stamped on the hat or edge.
So instead of asking how long a disc should last, ask how long yours has been lasting under your conditions. If you're replacing pads every other year and the discs are scored by then, something in the system needs attention. Otherwise, a quality disc might outlast two or three sets of pads before it needs to be swapped.
Hidden Cost Drivers: Bulk Pricing, Waste, and Real Cost per Disc
The sticker price on a disc rarely tells the whole story. Bulk pricing looks like a smart move until you factor in how many discs end up sitting on a shelf past their useful life, or how much cash gets tied up in inventory you don't need yet. A pallet of cheap discs can quietly drain your budget through storage, handling, and eventual degradation before you ever mount one on a tool.
Waste is the cost driver nobody puts on the purchase order. Cheap discs wear faster, break more often, and leave behind more dust and debris that eats into cleanup time. Every swap-out means downtime, and every failed disc adds to the scrap pile. If a disc costs 30% less but you burn through twice as many for the same job, the math flips fast.
Real cost per disc isn't the invoice line—it's the total spend divided by the actual work completed. That means adding up bulk discounts, waste rates, changeover labor, and the cost of rework from inconsistent results. A disc that saves you a few cents upfront can easily cost dollars more per finished part once all the hidden drivers are counted.
FAQ
OEM discs are built to match the exact specifications of the original equipment, from hole alignment to backing thickness. That consistency can reduce swirl marks and keep dust extraction working as intended.
For aggressive work, fiber or film backings usually outlast paper. A thicker, stiffer backing transfers more pressure to the abrasive surface without tearing, especially on edges or contoured metal.
Open-coat discs have wider gaps between abrasive grains, so they clog less on softwoods or paint. Closed-coat provides more cutting surface and finishes faster on hard, dense materials.
It matters more than most people think. Mismatched holes block airflow, trap heat, and cause dust to load up the disc. Match the pattern to your sander or the disc will wear out prematurely.
Don't jump too far between grits. A common path is 80 to 120 to 180, then finish with 220 or 320. Smaller jumps create finer, more uniform scratches that primer can fill easily.
Not usually. Ceramic shines under high heat and pressure, so pros removing welds or milling scale benefit most. For weekend projects, premium aluminum oxide often gives similar results for less money.
Look for rounded grains, a glazed surface, or increased pressure needed to get the same cut. When dust drops and heat rises, swap it - running dull discs burns the work and wastes time.
Hook-and-loop wins for quick swaps and reusability. PSA grips flatter and runs cooler on high-speed tools but becomes a hassle if you switch grits often.
Conclusion
Choosing OEM sanding discs often comes down to matching the abrasive to the job, not just grabbing whatever is on the shelf. Start with the surface you are working on—metal, wood, or painted body panels all respond differently, and using the wrong disc can leave deep scratches or barely remove material. Grit choice follows the same logic: coarse grits cut fast but leave rough finishes, while fine grits polish but take longer, so many pros keep a range on hand to step down gradually. The backing plate material also changes how the disc behaves; fiber backs are stiff and aggressive, film offers tear resistance and a consistent finish, and paper is economical for light-duty work.
Attachment style is another practical decision. Hook-and-loop makes disc changes quick and is ideal when switching grits often, but the loop material can wear out and adds a bit of thickness. PSA discs stick directly to the pad, which gives a firmer feel and lower profile, yet they are single-use and can leave residue. Durability expectations should be realistic: a cheap disc that clogs or tears after two minutes costs more in labor than a pricier one that lasts. Look at hidden cost drivers too—bulk pricing, how many discs actually get used per job, and waste from premature loading. The real cost per disc is not the sticker price; it is how many you burn through to get the job done right.
Contact Us
Contact Person: Amanda Wang
Email: [email protected]
Tel/WhatsApp: +86-13602569854
Website: https://www.sunabrasives.com.cn