
Best Calcium Chloride 94% Granules for Superior Deicing Performance
2026-11-02
Winter roads can turn treacherous in minutes, and not all deicers are up to the task. That’s where calcium chloride 94% granules come in—offering fast-acting, long-lasting melting power even in brutal cold. But with so many options, finding the right supplier matters. Shouguang Golden Chemical delivers a premium-grade product that consistently outperforms standard blends. Curious how it stacks up? Keep reading to see why this granular formula is a game-changer for superior deicing performance.
Not All Calcium Chloride Is Created Equal—Here's What 94% Purity Brings
Most bulk calcium chloride on the market falls short of the 94% mark, leaving behind sulfates, alkali metals, and other insolubles that quietly corrode equipment or cloud finished brines. At 94%, the chemistry shifts: you get a predictable calcium chloride content that dissolves cleanly and behaves the same from one batch to the next.
That consistency shows up fastest in dust control and de-icing. Lower-purity material can leave gritty residues that clog spray nozzles or demand extra filtration before the solution is usable. With 94% purity, the reduction in insolubles translates to fewer shutdowns for cleaning and a longer working window before precipitation begins to bind up lines.
There is also a dosing advantage. When the assay is stable, operators can set mix ratios once and trust them. You stop over-applying to compensate for unknown impurities, which means less product wasted and fewer corrective passes across the surface. For many sites, that quietly strips out a meaningful chunk of operating cost without changing the work plan.
The Real Reason These Granules Melt Ice Faster in Sub-Zero Weather
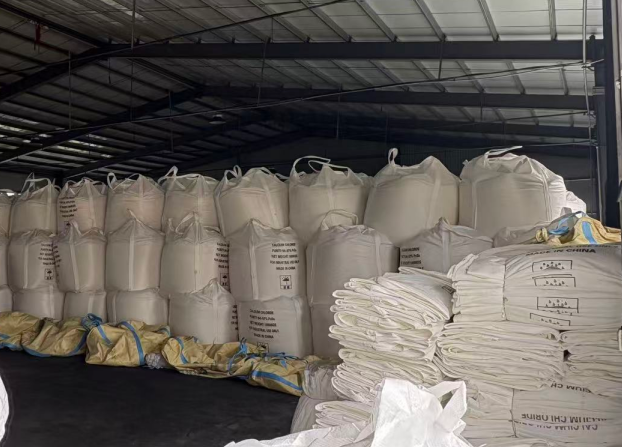
Most traditional ice melters lose their punch once the temperature dips below 15°F because they depend on dissolving into available water to form a brine. These granules, however, release heat the moment they touch even a microscopic film of moisture. That exothermic kick instantly creates a liquid brine with a far lower freezing point than what plain rock salt can manage, so melting starts immediately rather than waiting for the sun or traffic to soften the ice first.
Another factor is the granule's ability to pull moisture straight from the air, even when the air itself is well below freezing. This hygroscopic behavior means the product doesn't need pre-existing puddles or wet snow to begin working. As the granules draw in that trace humidity, they form a concentrated brine that spreads under the ice sheet and lifts it off the pavement, breaking the bond that makes ice so stubborn to remove.
The physical design of the granules also plays a role. Instead of bouncing off rock-hard ice, they embed into the surface and create small, localized melt zones. Those melt zones then expand as the heat and brine spread outward. So it is not one single trick but the combination of heat release, extreme freezing-point depression, and moisture attraction that lets these granules chew through sub-zero ice faster than the typical blue bag of salt.
A No-Nonsense Guide to Applying Calcium Chloride Granules
Start with a dry surface. Calcium chloride granules pull moisture fast, and if you dump them onto standing water or wet concrete, they clump into a slushy mess before they can work. Sweep away loose debris, then scatter the granules in a thin, even layer. You want roughly a handful per square yard for light ice, double that for thick, bonded ice. Walking the area while broadcasting with a scoop or gloved hand beats using a spreader on small paths because you can adjust on the fly and avoid piling up near edges.
Let the granules sit for ten to fifteen minutes before you break the ice. They need time to dissolve and work down through the frozen layer. If you chip too early, you just fracture the top crust and leave the lower sheet stuck. Once the ice turns slushy or honeycombed, use a flat shovel or ice chopper to lift and push it aside. This two-step approach uses less product than trying to melt everything down to bare pavement.
Clean up overspread granules that end up on grass or landscape beds. Calcium chloride can burn plant roots and corrode concrete if it sits in high concentrations. After the ice is gone, a stiff broom can move stray granules back onto the pavement where they belong. Store the bag tightly sealed in a cool, dry place—humidity turns granules into a solid brick faster than you'd expect.
Keeping Concrete and Asphalt Safe Without Sacrificing Performance
Concrete and asphalt surfaces face a constant tug-of-war between providing enough grip for vehicles and pedestrians and staying smooth enough to limit wear, noise, and rolling resistance. The key lies in controlling the microtexture and macrotexture of the pavement. A surface that is too polished can turn slick in wet weather, while one that is overly rough may accelerate tire wear and increase fuel consumption. Blending the right aggregate types and adjusting the finishing process lets engineers create a profile that bites into tires without feeling harsh underfoot or behind the wheel.
Modern surface treatments make it possible to boost safety without rebuilding the entire pavement structure. High-friction sealants, thin-bonded overlays, and diamond grinding can restore skid resistance on aged concrete or asphalt while keeping the ride quality intact. These methods target the top few millimeters of the surface, so load-bearing capacity and drainage patterns remain unaffected. By applying them selectively in curves, intersections, or braking zones, agencies can focus resources where accidents are most likely and avoid unnecessary roughness on straight, high-speed sections.
Ongoing performance depends on monitoring how the surface changes with traffic and weather. Regular skid testing and visual inspections help identify spots where polishing or flushing has begun, allowing crews to schedule maintenance before conditions become hazardous. This proactive approach extends the life of the pavement and keeps it performing as intended, rather than waiting for a failure that forces costly emergency repairs. In the end, safe concrete and asphalt are not about sacrificing smoothness or strength, but about fine-tuning the surface to match the demands of each location.
How to Cover Large Areas Without Burning Through Your Budget
The temptation to grab the cheapest paint or flooring you can find is real, but that often backfires when you need three coats just to hide the old color. Instead, start by measuring the actual square footage and looking for high-coverage products—paints with a high solids content or thicker textured materials can stretch much further than watery bargain options. Check the returns section at your local building supply store too; people frequently overbuy and return unopened cans or boxes, which get resold at a steep discount.
Another approach that works surprisingly well is to split the job into phases. Don't feel pressured to finish every wall or every square foot in one weekend. Tackle the most visible section first, learn how the material behaves, then buy exactly what you need for the next phase. Renting equipment like a paint sprayer or floor sander for a single day often costs less than buying a cheap version you'll use once and then trip over in the garage for years.
Don't overlook the power of mixing materials from different sources. Standard paint can go on the main walls, while a mismatched but durable floor paint from a clearance shelf works fine in a low-traffic closet or utility area. Just don't sacrifice surface preparation to save a few dollars—uneven, dirty surfaces eat up extra material and force you to apply more. A little sanding and priming beforehand means your budget-friendly topcoat actually gets the coverage promised on the label.
Simple Storage Habits That Keep Your Deicer Ready for Action
A deicer that clumps into a brick is about as useful as no deicer at all. The real trick isn't buying the fanciest blend—it's where you put the bag after the first use. Keep the original packaging intact and roll the top down tightly, then tuck it inside a heavyweight trash bag or a lidded bucket. A little extra effort here beats wrestling with ice melt that's fused into one solid lump by mid-January.
Moisture is the enemy, so think about airflow before you stash it. A cold, dry corner of the garage works better than a spot near the water heater or a humid basement. If your bag sits directly on concrete, slide a scrap piece of plywood or an old shelf underneath. That small gap keeps condensation from seeping in through the bottom and turning powder into paste.
Finally, label the container with the date you opened it. Most deicers stay effective for a season or two if sealed well, but older product can lose its kick. When you grab that bucket in December, you want something that actually melts ice—not something you have to chip apart with a hammer before the coffee's done.
FAQ
Higher purity means fewer inactive fillers and more actual melting power per scoop. With 94% granules, you're getting nearly all active calcium chloride, so you can use less product to get the same result and you're not spreading as much residue that can track indoors or harm nearby grass.
They stay effective down to about -25°F, which covers nearly any winter condition you'll face in most regions. That's a huge advantage over rock salt, which loses its punch around 15°F and leaves you with a frozen mess on really cold mornings.
Use a handheld spreader or scoop and scatter a thin, even layer—about a handful per square yard for light frost. For thicker ice, break the surface first with a shovel or ice chopper, then apply granules to the remaining layer. Avoid piling it up in one spot, because concentrated calcium chloride can leave a white residue and may increase scaling on older concrete.
For a light dusting of ice, around 0.5 to 1 ounce per square yard is plenty. For compacted snow or thick ice, you might go up to 2 or 3 ounces per square yard. More than that rarely speeds things up—it just creates a slushy, slippery layer and wastes product.
Yes, you can mix them about one part calcium chloride to three or four parts sand. The granules will melt down into the ice and loosen the bond, while the sand gives immediate grip. It's a practical combo for walkways where you need both traction and melting action, especially on slopes.
Calcium chloride is less irritating to paws than rock salt, but it's still a salt. After it melts the ice, the runoff can build up in soil and hurt grass or shrubs if you overuse it. Wipe your pet's paws after walks and avoid dumping excess granules in garden beds. A little goes a long way.
Keep it in an airtight container or tightly sealed original bag, off the floor, in a dry spot like a garage shelf. Calcium chloride loves moisture, so even humidity in the air can make it clump. If it does harden, you can usually break it up with a hammer, but dry storage prevents most of that hassle.
It can, especially if you use more than needed or walk through the melted slush before it dries. Using a coarse mat at the door and wiping shoes helps a lot. You can also reduce residue by applying the minimum amount that does the job, since 94% granules are concentrated enough to work with less.
Conclusion
If you’ve ever fought an ice-slicked driveway at dawn, you already know the difference between a deicer that works and one that just sits there. A 94% calcium chloride granule earns its place because it doesn’t rely on guesswork—higher purity means less filler, faster heat release on contact, and fewer passes to break that stubborn bond between ice and pavement. This is the kind of product you notice during a hard freeze, when ordinary blends turn slushy then refreeze, while these granules keep cutting through at temperatures that send everyone else back inside. The trick isn’t spreading more; it’s spreading smarter. A light, even toss along traffic paths before the storm hits gives the brine a chance to form and stop ice from locking down in the first place. For bigger lots or long commercial sidewalks, a hand-crank broadcaster or walk-behind spreader turns a tedious job into a ten-minute routine, and because the granules are dense and uniform, you’re not fighting clumps or wasting half the bag on a single patch.
Concrete and asphalt don’t have to suffer for the sake of traction. The exothermic kick that makes calcium chloride so effective also means it works fast enough to reduce the standing water that can seep into pores and crack under freeze-thaw cycles—when used as directed, it actually lowers that risk compared to letting ice linger. And your budget stays intact when you treat it as a preventive tool rather than a last-minute rescue. One measured pass before the worst of a storm, a second light pass only where traffic has churned things up, and you’ve covered far more ground than with a cheaper rock-salt soak. After the thaw, don’t just toss the open bag in the corner. Seal it tight, keep it off bare concrete floors, and store it up on a pallet or shelf in a dry spot. Moisture is the enemy—if the granules start drawing humidity, they’ll brick up and become a chore to break apart. A five-gallon bucket with a gamma-seal lid works better than any fancy bin. Keep it dry, keep it close to the door, and you’ll be ready next time the temperature drops without a second thought.
Contact Us
Contact Person: Tom Cui
Email: [email protected]
Tel/WhatsApp: +8618663670626
Website: https://www.jinjigoldenchem.com